There's more than a few similarities between Paint.NET and Photoshop, some specific functions may differ but most can be duplicated, from what I've seen. (If you're trying Paint.NET for the first time, numerous effects plug-ins can found at the Paint.NET forums. I'd recommend at least downloading BoltBait's pack.)In the following example the default black and white colors will be assumed, i.e. black text on white background. Obviously you can use whatever colors you like just by selecting different colors from the palette.
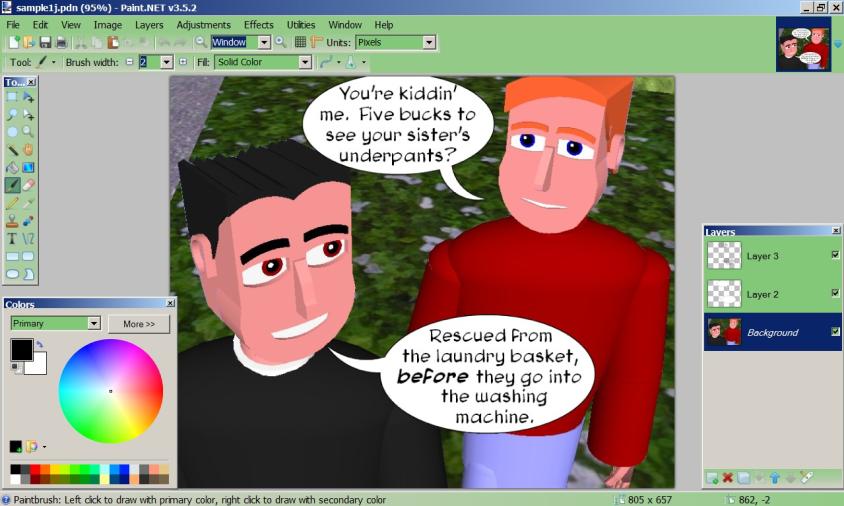
Let's assume you have your art ready in .jpg format or similar graphic filetype. Step 1, open the file in Paint.NET and you'll see something like this:
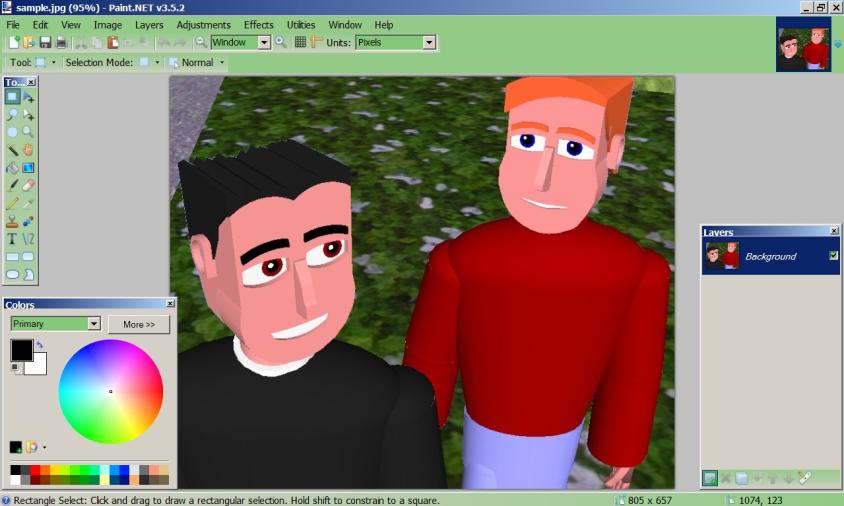
The .jpg opens in the default Background bottom layer.
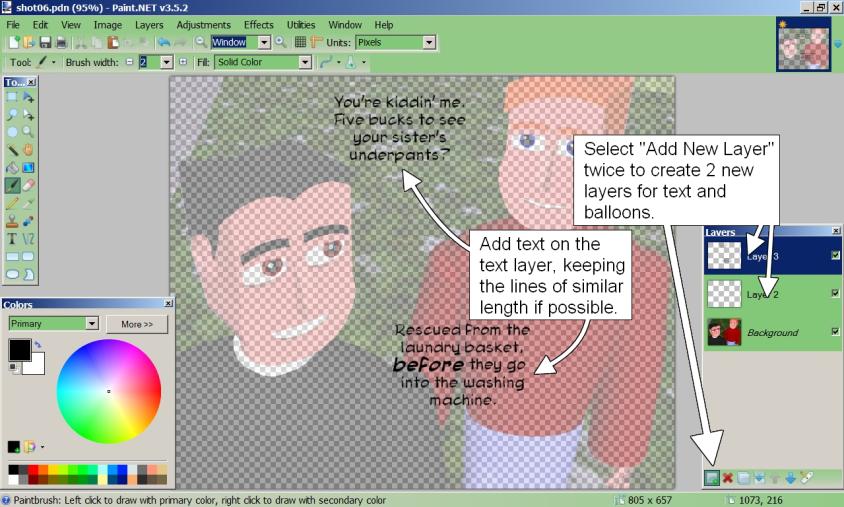
Step 2, add 2 new layers for text and balloons:
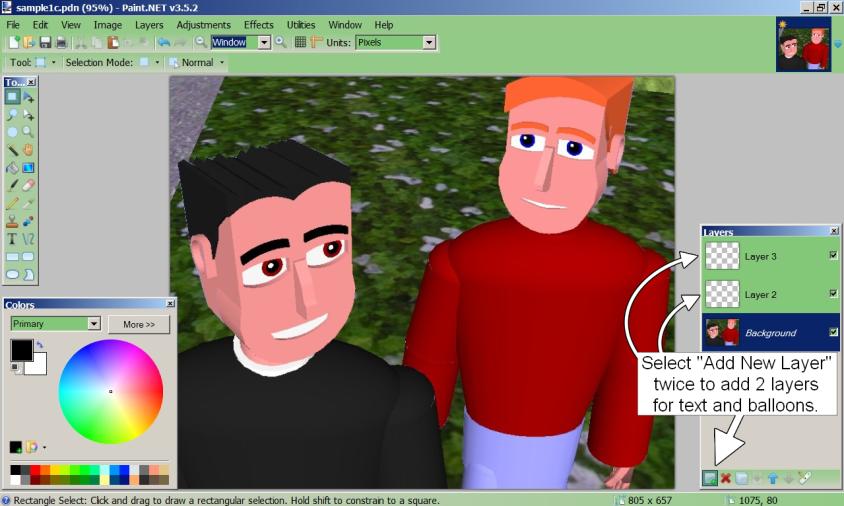
In the beginning I used to faithfully rename every layer (e.g. "Dialogue" and "Balloons") until I realized what a dumb waste of time this was. Most comic panels have 3 layers, art on the bottom layer, balloons in the mid layer, text on the top layer. Since this is self-evident just by looking at the screen, I just leave the default layer names as they are, i.e. Layer 2, Layer 3, etc.
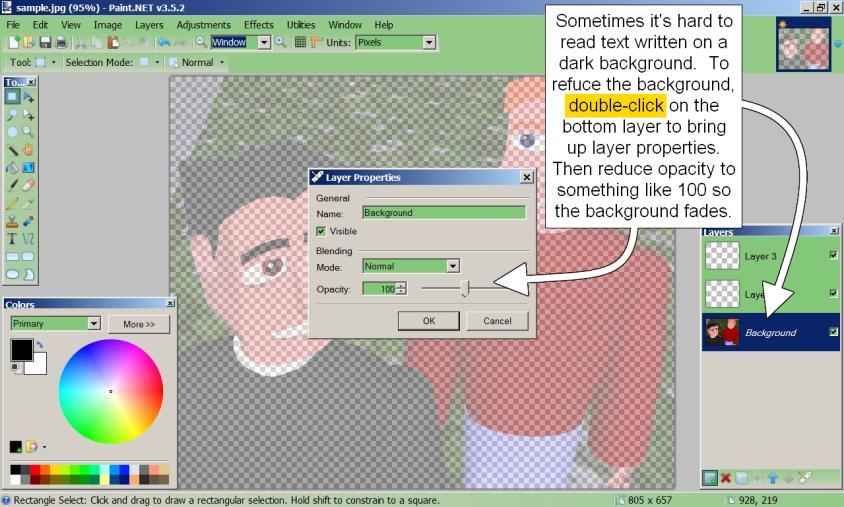
Step 3, if your background picture is too dark then reduce the opacity, which makes it easier to read text:
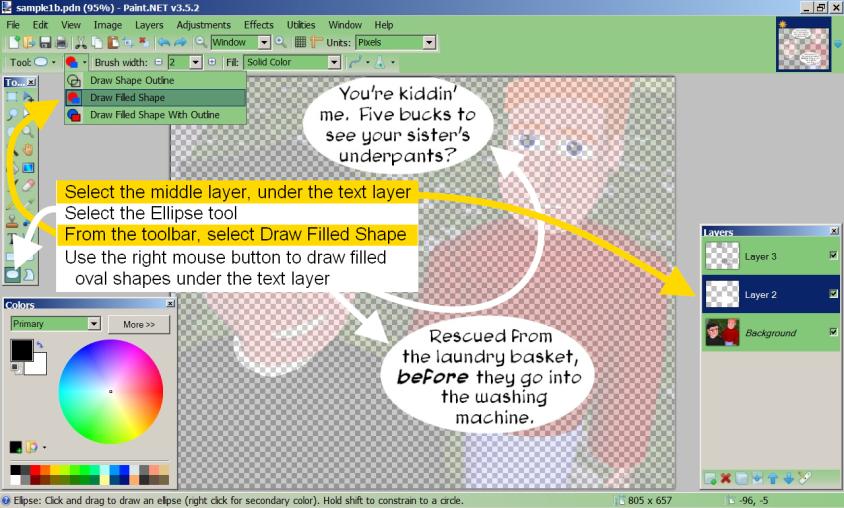
Step 4, select the top layer and add your text. Center your text, natch. If you're doing oval balloons then make the middle text lines wider than the top and bottom lines. If you're doing rounded rectangular balloons then try to make the line lengths as equal as possible (see Rounded rectangle balloons below).

Step 5, select the middle layer and use the Ellipse tool to add balloons (using right-mouse button for white... or you can flip the colors over in the Colors tool window so white is on the left button if you prefer):
Sometimes it takes me a few shots to get the oval shapes the right size and position, I hit Ctrl-Z to undo and try, try again until they look right.
Step 5b, insert a new layer above the balloons layer, this is for the tails:
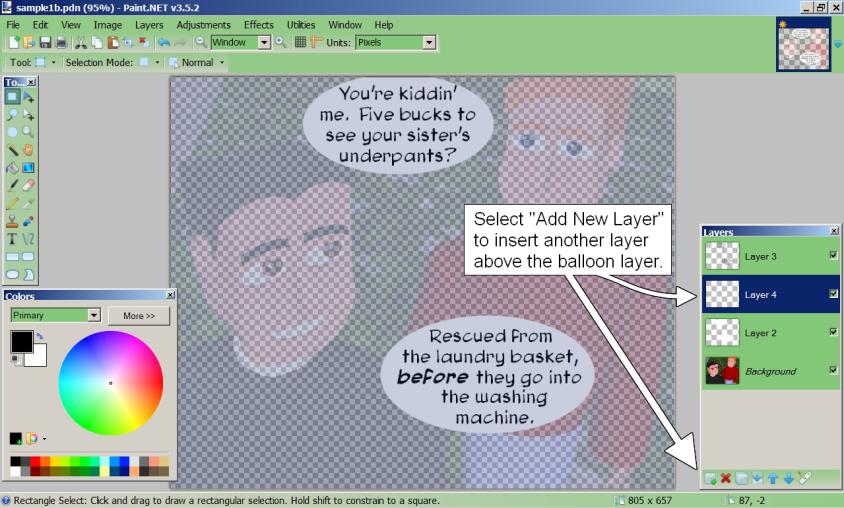
Now I could have added 3 layers at Step 2 above instead of just 2 layers, but I like to take it easy and not tax my brain too much. I concentrate on adding the text first, the balloons next, then worry about the tails last.
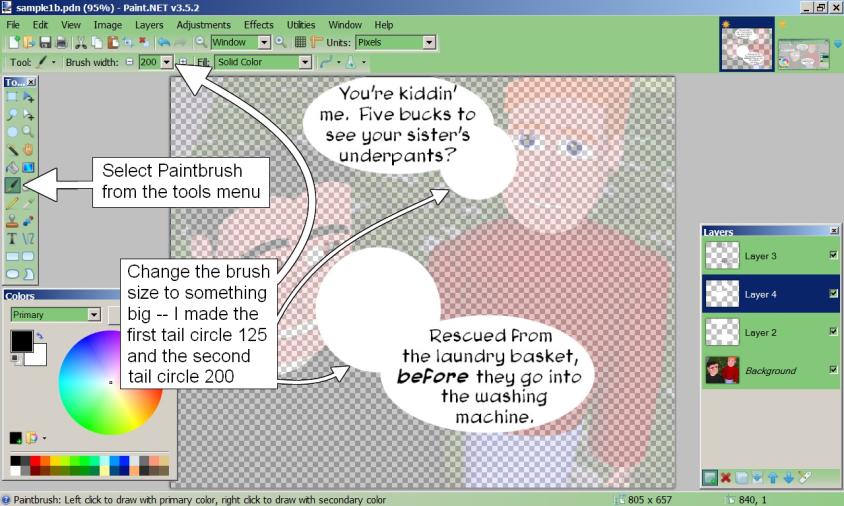
Step 5c, use the Paintbrush tool to add 2 white circles that will be trimmed (in the next step) to become the balloon tails:
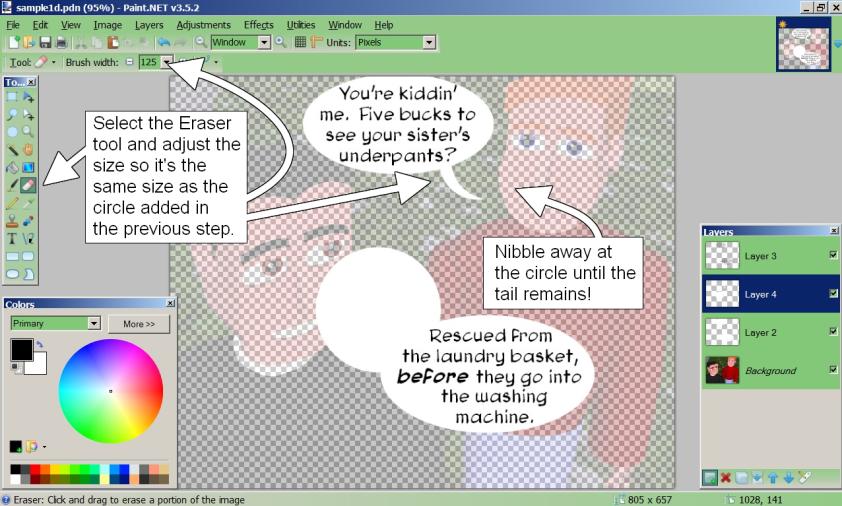
Step 5d, use the Eraser tool to trim or nibble at the circle, leaving the balloon tail:
Step 5e, ditto for the second balloon tail:
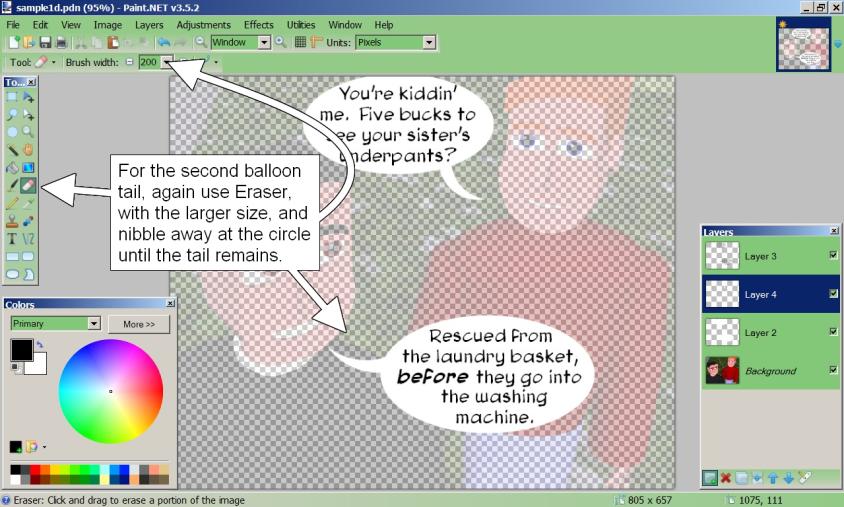
You really have to judge where the tails have to go and which circle size will be suitable, it's pretty much trial and error. But since the tails are on their own layer, you can completely erase them if you want and draw new white circles at another size or position, without messing with the balloons -- they're on a different layer, remember?
Step 5f, once you've made the tails, merge the tails and balloons layers using Merge Layer Down:
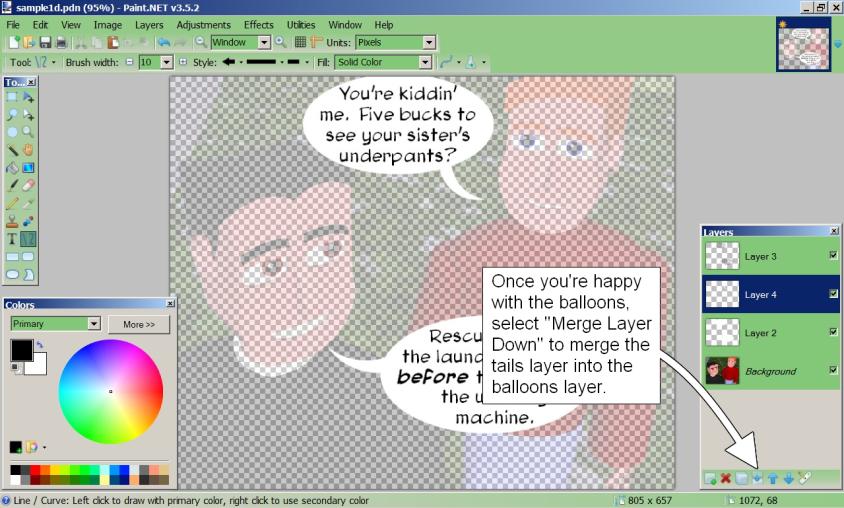
One thing I'll mention, sometimes when balloons are in close proximity to each other, it's awkward to draw tails or to nibble at them with the Eraser tool without affecting other nearby tails. When this happens I'll do them one at a time, creating a new tails layer above the balloons layer and then merging the layers when the tail is done -- and then create another new tails layer for the next balloon/tail combination. Repeat as needed.
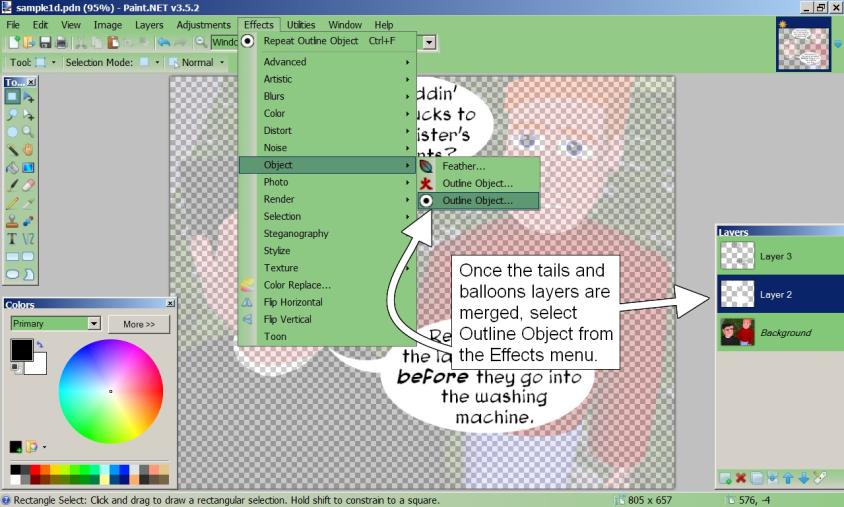
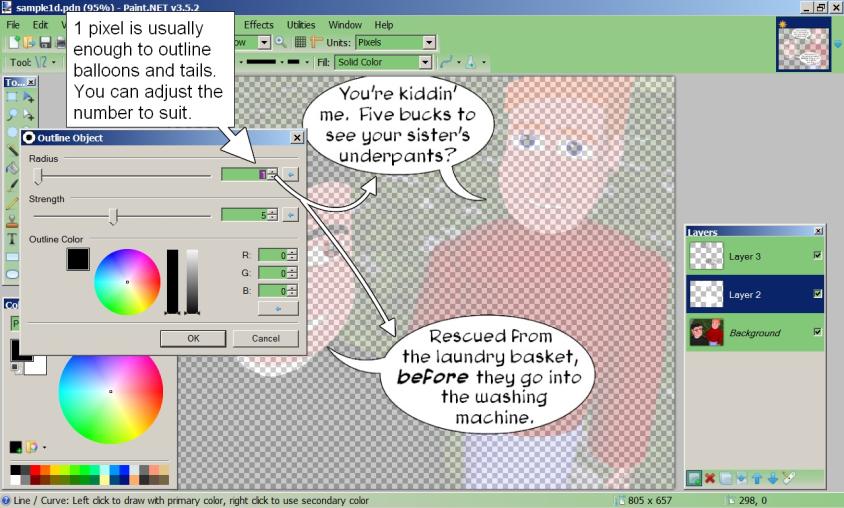
Step 5g, once the tails and balloons layers are merged, you'd maybe want to add an outline around them:
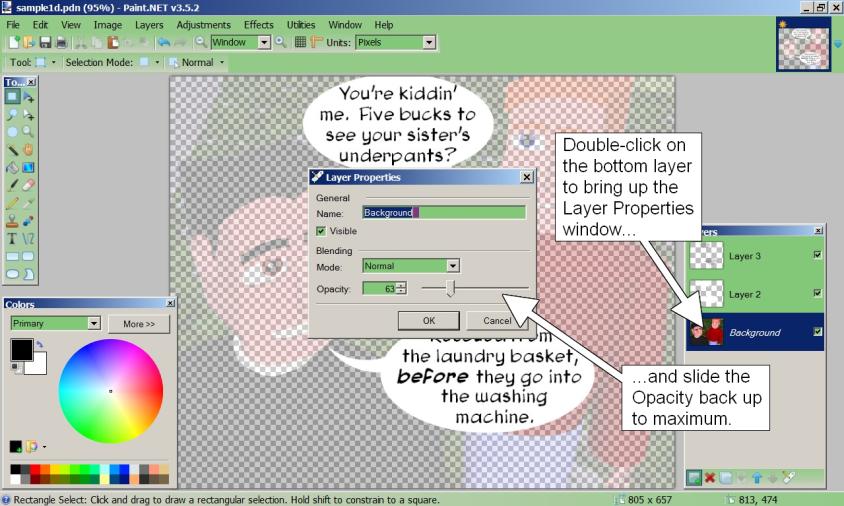
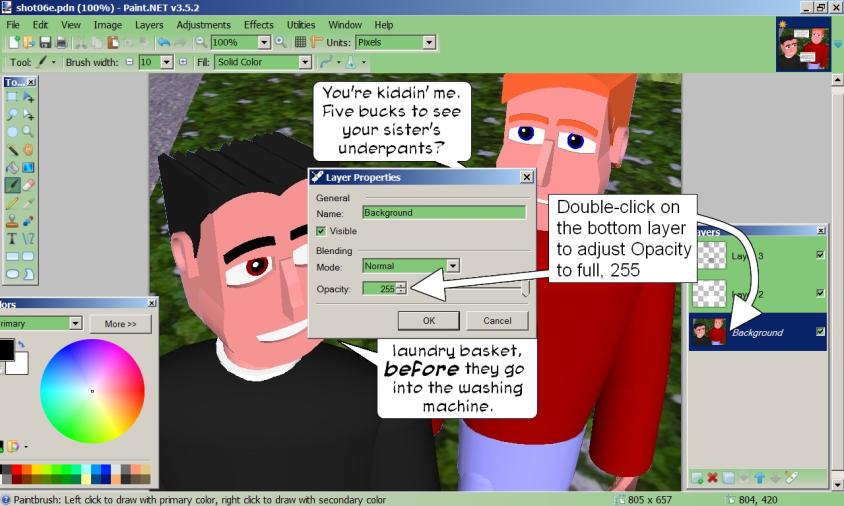
Step 5i, lastly, select Layer Properties and return the Opacity to full, 255:
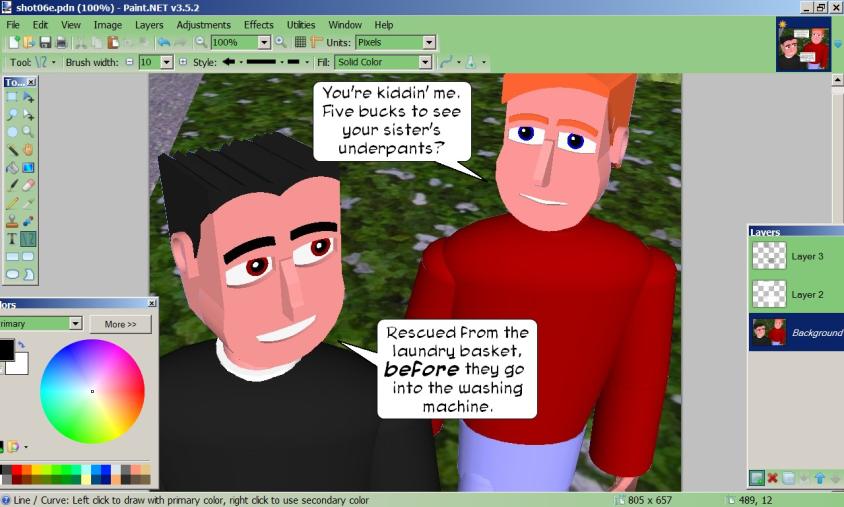
Which gives us the completed panel:
There, that wasn't too complicated, was it? It's like anything else, do it a dozen times and you switch to autopilot.
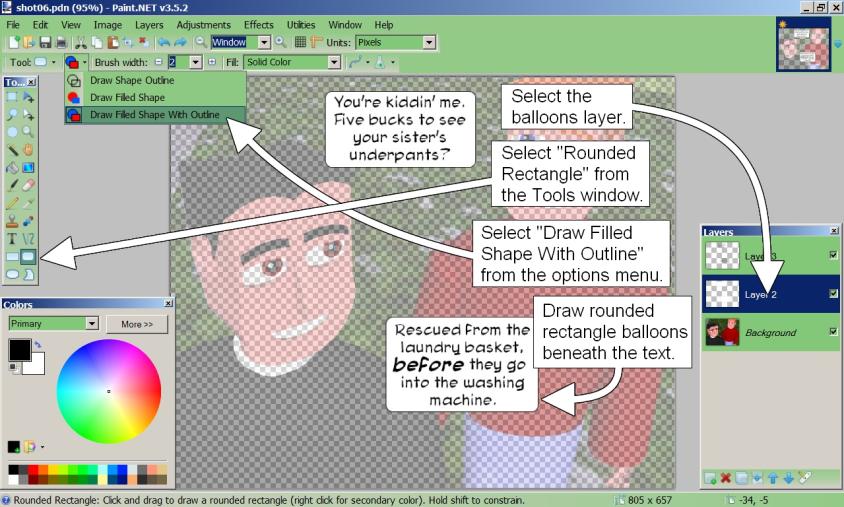
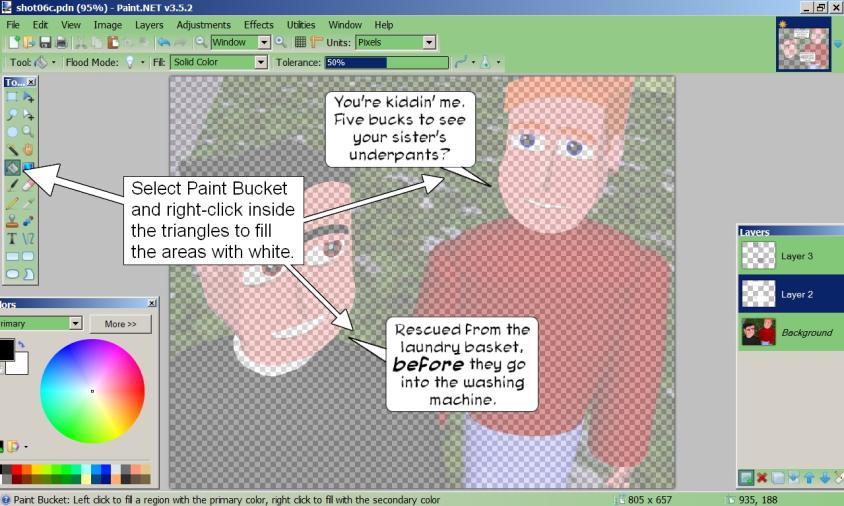
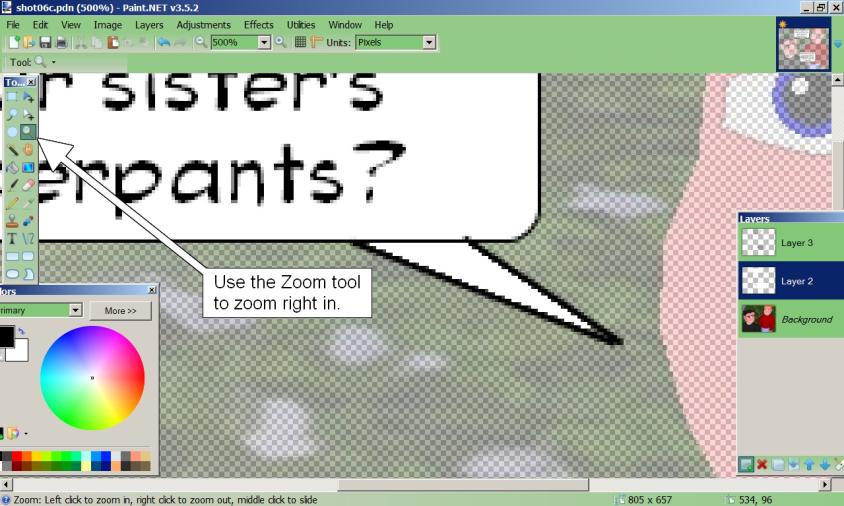
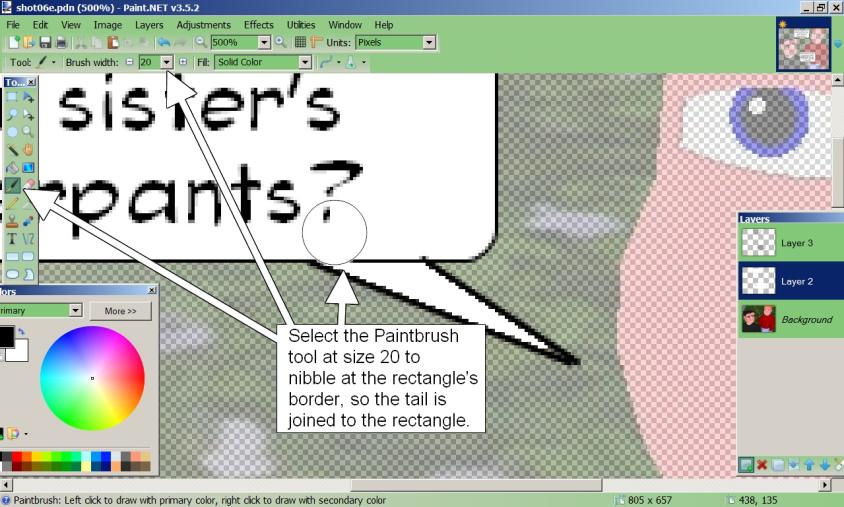
Step 6, if on the other hand you prefer rounded rectangle balloons to oval balloons, here's a quickie guide, 'cause they're easier! Rounded rectangle balloons

And that's that.
Update, 07 June 2011.Another how-to example, just in case I missed anything in the steps above: